Final: 3D Printed Lamp Take 2
When I found out I'd need to buy a 3D printer for this class, I immediately began thinking of things I could and give out as presents. When we did the lamp assignment, I actually really liked my lamp and thought it can out really well. After that project was finished, I was thinking about ways I could travel with a bunch of lamps to give to family members over winter break. I knew the lamp I'd made before would fit very well in a suitcase. So after much pondering I thought what if I assembled the lamps when I get to travel destination? But then I realized that my family members would have the exact same problem about lamps fitting in suitcases, and I also did not want to spend my entire vacation hot gluing. So then I thought what if my family members assembled the lamps themselves when they got home? But I didn't think any of them would actually take the time to hot glue the pieces together, so that wouldn't work either. More determined than ever not to spend money on gifts for my family, I pondered longer. Then, it hit me: what if the lamp could click together like legos? Then it could be a lamp and a fun project! So that's what inspired me to do this.
Side Note: It was recently pointed out to me that I will need to spend money on these gifts because I need to supply the actual lamp part of the lamp and not just the shade. While this is disapointing, it did not dampen my excitement around doing this.
Side Note: It was recently pointed out to me that I will need to spend money on these gifts because I need to supply the actual lamp part of the lamp and not just the shade. While this is disapointing, it did not dampen my excitement around doing this.
|
Initially I thought I'd make pentagons that fit together like in Assignment 4, but Professor Nadya pointed out that might be difficult to assemble. So a student in class sent me one of per projects (to the right), showing how she used what I will be calling "pins" (for lack of a better word) to hold cardboard pieces together. I really liked that ideas, but I didn't really like how the cardboard stuck out from the shape. So I decided I would make a pin you can put right on the tips of the vertices of to hold it together. I thought that might be less obvious. |

|

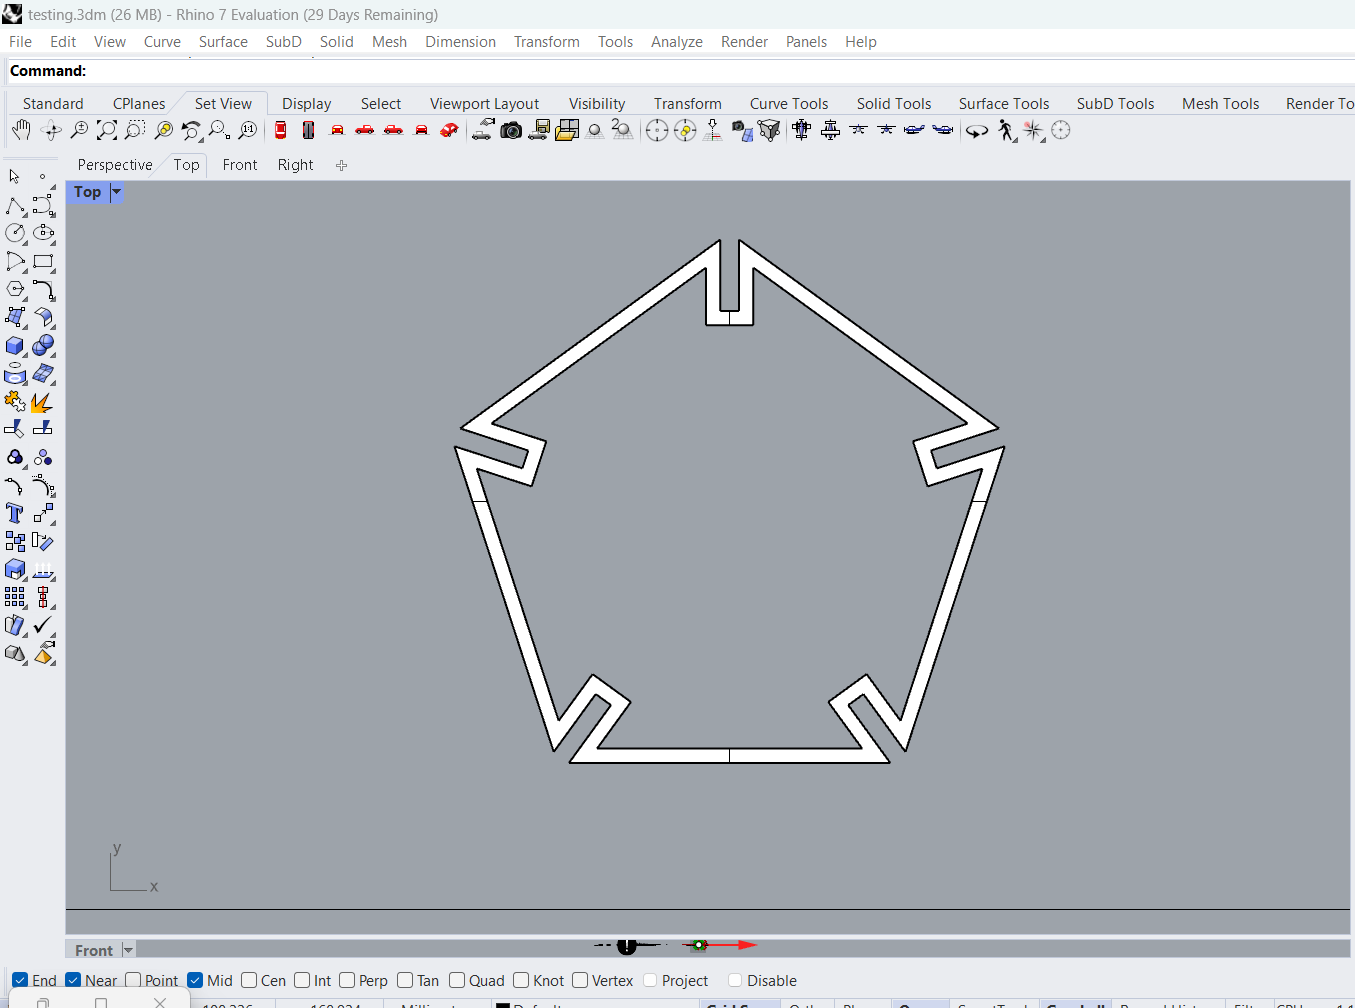
I started with the most important part: the pentagon. In assignment 2, the slits had been on the sides of the shape. I needed to move the slits to the vertices of the shape. After a LOT of math (special thanks to Harish Chandra Rajpoot on math.stackexchange.com for answering a random question seven years ago) I got the slits on the vertices and I was very proud of myself.

Lots of math.

|
My new pentagon model (to the right). |

|
After creating the shape, I needed to fill it with something. I found a YouTube video online that showed how to make a voronoid pattern (thank you June Lee of YouTube) and I really liked it. I tried to make the voronoid in the same shape as the pentagon, but I was having trouble with that so instead I opted to just make a square of voronoids and trim out the pentagon.


|

|
I offset the pentagon to make a border I could boolean union with the voronoid that I trimmed. I then extruded the surface one millimeter.
|

|
I chamfered the edges of the pentagon solid so they would align properly when all put together, and added a tube to one of them to fit the light bulb into.

|
I created these pins to hold the pieces of pentagon together. If I had more time I would have chafered the corners of these as well.

|
Finally it was time to start printing. I printed one pentagon and it came out really well, so I set my printer to print two more and went to bed. In the morning, the print had failed and ripped the rubber head of the extruder. The hole extruder was caked with filament and everything was jammed up.

|
This is what the print looked like. Clearly failed. I was going to try to keep using the printer, but then I accidentally broke the fan as well (oops) so at that point I knew I needed to go to the mill.

I used both the Prusa and the Dremmel printers at the mill, and the Prusa printers are so much better.

The Dremmel printers failed most of the time.

I tried out different sizes of tube and different sizes of pins to find what fit best.

|

|
And finally after a dozen hours of printing and my sanity, the lamp was finished! Upon putting in the last piece, I felt like I was going to cry. But honestly I did not have the energy for that.

|

|
|
Pentagon Dimensions
|
Pin Dimensions
|
